News

Gardening With Kids: Dirt, Drama, and Delayed Gratification
  • Article published at:
  • Article author: Joanne Steers
  • Article comments count: 0
Gardening With Kids: Dirt, Drama, and Delayed Gratification
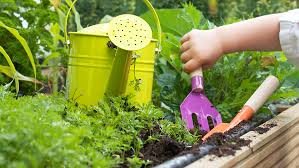
Want to bond with your kids and maybe grow something other than screen time? Try gardening. It’s messy, slow, and wildly unpredictable—just like parenting! But, watching your child pull a carrot they grew from actual dirt somehow feels like a tiny miracle, even if it’s a weirdly shaped carrot. Here’s how to start a flower and vegetable garden with your kids without needing a glass of wine afterward. (Okay, maybe just one.) 1. Choose Plants That Don’t Judge You The goal here is survival. You want plants that and won’t wither if you or your 5-year-old forgets to water them for three days straight. For the veggie garden: Cherry tomatoes (basically weeds, in the best way) Carrots (fun to yank out of the ground) Lettuce (grows fast, dies fast, drama queen) Radishes (a root vegetable that literally grows in like a week) Sugar snap peas (climby, snacky, adorable) For the flower garden: Sunflowers (giant and impossible to ignore) Marigolds (basically bulletproof) Zinnias (they thrive on neglect) Nasturtiums (bonus: you can eat them if all else fails) Calendula (like marigolds, but with an ego) 2. Let the Kids Choose—Just Not All the Things Give them a few seed packets to choose from. But don’t let them go rogue unless you’re cool with growing ornamental gourds and mystery pumpkins on your balcony. Steer the chaos with gentle guidance.    3. Embrace Containers, Raised Beds, and the Art of Lazy Gardening Unless you have acres of land and the patience of a monk, stick with containers or raised beds. They’re easier to manage, less prone to becoming a weed jungle, and way more kid-accessible. Bonus: you don’t have to bend over constantly like you’re in a Jane Austen novel. Pro tip: repurpose old pots, buckets, or literally anything that holds dirt and drains water. Ugly? Maybe. Functional? Absolutely.   4. Turn It Into a Sensory Circus Let them touch the dirt. Smell the basil. Freak out over a worm. Gardening is a sensory experience, and kids love the chaos of nature. It’s good for them!  Add wind chimes, plant labels they decorate themselves, and maybe a weird garden gnome or a fairy house for maximum whimsy.   5. Watering: A Teachable Moment in Not Flooding  Teach them how to water gently, then let them go to town. You may lose a few seedlings in the process, but you’ll gain valuable life lessons about moderation. (Eventually. Maybe.) Make it part of a routine: water in the morning or after school.   6. Celebrate the Wins (Even the Ugly Veggies) When something finally blooms or sprouts, act like they won the Nobel Prize. Take pictures. Make a salad. Eat a sugar snap pea like it’s gourmet. Kids love praise, and honestly, we all deserve a little celebration after keeping a plant alive longer than a houseplant in our college dorm rooms.   Final Thought: It’s Not About the Garden, It’s About the Dirt Under Their Nails You’re not just growing vegetables and flowers, you’re growing patience, confidence, and possibly a lifelong love of the great outdoors. It’s easy to throw on another episode of Bluey, but  getting your kids outside and excited about nature and accomplishing small garden victories is so rewarding! Gardening with kids is messy, ridiculous, and magical. Embrace the chaos, take the pictures, and enjoy the fact that for once, they’re excited about something that doesn’t require charging. Note: I am going to add links to a few products we carry- overalls , wellies, garden print rompers from Ettie and H and also a few links to outside products like a gardening kit or organic seeds to drive SEO. SEO Keyword Tags: gardening with kids how to plant a vegetable garden with kids easy flower garden for kids beginner gardening for families fun garden ideas for children  
Learn More
Dyeing Eggs Naturally (Without Breaking the Bank or Your Sanity)
  • Article published at:
  • Article author: Joanne Steers
  • Article comments count: 0
Dyeing Eggs Naturally (Without Breaking the Bank or Your Sanity)
Let’s be real; eggs are basically a luxury item these days. They cost so much I’m surprised they’re not displayed in a glass case at the grocery store. So, if you’re going to dye them, you might as well do it right. Forget those little fizzy tablets that turn your fingers Smurf blue and blood red. This year, we’re going natural. You’ll get beautifully muted, earthy tones that look like they came straight from an overpriced Etsy shop, and the best part? You can make a killer egg salad when you’re done. No waste!   The Basics: How It Works   Natural dyes come from things you probably already have in your kitchen or fridge. The concept is simple: boil the ingredients to extract the color, soak the eggs in the dye bath, and let science do its thing. The longer they sit, the deeper the colors. It’s easy, fun, and makes you feel vaguely like a pioneer woman—minus the dysentery.   What You’ll Need             •           Eggs (obviously, but I feel obligated to say it)             •           White vinegar (makes the colors stick)             •           Water             •           Natural ingredients for dyeing (see below)   Dye Ingredients and Colors They Magically Create             •           Red Cabbage = Blue (because nature is weird like that)             •           Yellow Onion Skins = Orange/Golden Brown             •           Beets = Pink (as long as you don’t mind your kitchen smelling earthy for a bit)                         •Turmeric = Bright Yellow (bonus: your countertops will never be the same,        kidding- place a towel down to avoid staining)             •           Spinach or Parsley = Pale Green (requires patience but worth it)             •           Coffee or Tea = Light Brown (perfect for that rustic, Instagram-worthy vibe)   How to Make the Dye             1.         Chop and Simmer: Roughly chop your veggies (or just toss in the peels) and throw them in a pot. Add 4 cups of water and 2 tablespoons of white vinegar.             2.         Boil and Steep: Bring to a boil, then simmer for about 30 minutes. The longer it simmers, the more intense the color. Let it cool to room temp if you don’t want to crack your eggs.             3.         Strain and Pour: Strain the liquid into a bowl or jar. Now you have your dye bath.   Dye Those Expensive Beauties             1.         Hard-boil your eggs (12 minutes in boiling water, then straight into an ice bath).             2.         Place the eggs in the dye bath. For pale colors, soak for 30 minutes. For rich, deep colors, leave them in the fridge overnight.             3.         Pull them out, marvel at your work, and pat yourself on the back for being so crafty.   Pro Tips for Eggcellence             •           For a marbled effect, wrap the eggs in onion skins before boiling.             •           Want speckled eggs? Dab with a paper towel while they’re still damp.             •           If you’re feeling fancy, add a little olive oil at the end for a glossy finish.      Wait, Don’t Toss Those Eggs—Make This Killer Egg Salad Instead After all that effort, you deserve something delicious. And honestly, nothing hits quite like a good egg salad. It’s comforting, easy, and perfect for using up those beautifully dyed eggs before they stink up your fridge.   Ingredients             •           6 hard-boiled eggs, peeled and chopped             •           3 tablespoons mayo (or Greek yogurt if you’re pretending to be healthy)             •           1 teaspoon Dijon mustard (because we’re not animals)             •           1 tablespoon dill relish (optional but highly recommended)             •           Salt and pepper to taste             •           A dash of paprika if you’re feeling fancy   Instructions             1.         In a bowl, mash the eggs with a fork. Chunky or smooth—it’s your call.             2.         Add the mayo, mustard, relish, salt, and pepper. Stir until combined.             3.         Sprinkle with paprika if you want to impress yourself.             4.         Serve on toasted bread, in a lettuce wrap, or eat it straight out of the bowl standing over the sink. No judgment here.   Now go forth: dye and eat those overpriced eggs!  You’ll feel crafty, your Instagram will look amazing, and you’ll have a fridge full of egg salad. Win-win.
Learn More
Six Delightfully Wholesome and Different Ways to Celebrate St. Patrick's Day with Kids
  • Article published at:
  • Article author: Joanne Steers
  • Article comments count: 0
Six Delightfully Wholesome and Different Ways to Celebrate St. Patrick's Day with Kids
Move over, green milkshakes! There's more to St. Patrick's Day than hunting for four-leaf clovers, Shamrock Shakes, and hoping the leprechauns don't make mischief. Here is our fresh take on celebrating Ireland's favorite day with activities that blend tradition, creativity, and plenty of craic (that's Irish for fun!).   1. Irish Storytelling Festival Transform your living room into a cozy seanchaí (pronounced Shawn’ ack ee—feel free to practice saying it first!) corner. Dim the lights, grab some pillows, and dive into some Irish folk tales. I recommend reading The Children of Lir—where four siblings are turned into swans by their jealous stepmother and must wait 900 years to become human again—and Oisín and Tír na nÓg, in which Oisín, a brave warrior, travels to the mystical land of eternal youth but ages instantly when he returns home. After reading, encourage your kids to retell the stories with their own creative twists! Maybe in their version, the Children of Lir become superhero swans who save the world, or Oisín returns from Tír na nÓg, but this time, he turns into a dog instead of aging. The possibilities for fun and imagination are endless!   2. Celtic Kitchen Adventures Skip the green pancakes this year and dive into real Irish cuisine with a kid-friendly twist. Let little hands help make traditional soda bread (perfect for budding bakers since there's no yeast involved), then set up a "butter lab" where they can shake heavy cream in jars until it becomes butter. Watch your little one delight in the pure magic when the cream suddenly becomes butter! All you need is: 4 cups  all-purpose flour 1 teaspoon  baking soda 1 teaspoon  salt 1 - 1 1⁄2cup  buttermilk Directions: ·       Heat oven to 425 degrees F. Brush a baking sheet with melted butter or spray with non-stick spray. ·       Combine dry ingredients in a deep bowl. Gradually stir in 1 cup buttermilk, beating constantly, until dough is firm enough to be gathered into a ball. If dough crumbles, add up to 1/2 cup more buttermilk, 1 tbsp at a time, until it holds together. ·       Place on a lightly floured board and pat into an 8-inch flattened round loaf. ·       Place loaf on baking sheet and slash a 1/2-inch deep "X" into the top of the dough with a small, sharp knife. ·       Bake at 425 degrees F for about 45 minutes, or until the top is golden. ·       Serve hot.   Homemade butter recipe: ⅔ cup cold heavy whipping cream 1 1-cup canning jar with lid and ring Pour the contents into jar and shake for 15-20 minutes (you are going otherwise want to take turns)  when it resembles butter--pour the contents of the jar into a fine-mesh strainer and strain out the buttermilk, leaving the solid butter. Remove the lump of butter and wrap in plastic wrap. Refrigerate until needed.  MAGIC!!!    3. Gaelic Games Championship Host your own mini-Olympics featuring traditional Irish sports with safe, silly adaptations. Try Balloon Hurling (using pool noodles (the dollar store usually has them in stock)  and balloons instead of hurley sticks and sliotars), or indoor Gaelic Football with soft balls. Award medals made from chocolate coins wrapped in gold foil – because everyone's a winner when chocolate's involved.     4. Rainbow Science Spectacular Combine Ireland's famous rainbows with STEAM education. Create a magical Walking Water Rainbow experiment using items you probably already have: What You Need: • 6 clear cups • Paper towels • Water • Food coloring (red, yellow, and blue)   Steps: 1. Line up the cups in a row and fill every other cup with water (1st, 3rd, and 5th). Leave the others empty. 2. Add food coloring: • Red in the 1st cup • Yellow in the 3rd cup • Blue in the 5th cup 3. Fold paper towels into strips and place one end in a full cup and the other in an empty cup (bridging them). 4. Watch the magic! Over a few hours, the water will travel up the paper towels, mix, and create a rainbow!   5. Lucky Potato Treasure Hunt Embrace Ireland's famous spud in a whole new way. Hide golden-painted potatoes around your house or yard, each containing a clue written in simple Irish phrases. The final treasure? A pot of chocolate gold coins and a book of Irish folktales. It's like a scavenger hunt met a history lesson had a deliciously educational baby.   6. Luck and Kindness Challenge Create a family tradition of spreading luck through kind deeds. Have kids write down simple acts of kindness on paper shamrocks, then complete them throughout the day. It teaches children that making others feel lucky is just as fun as finding luck yourself. After the Wee Ones Are in Bed, reward yourself with a proper Guinness and some contemporary Irish entertainment. Queue up the darkly hilarious "Bad Sisters" on Apple TV+ or the absolutely brilliant "Derry Girls" on Netflix. Both shows capture the wit and charm of Ireland.  Last but not least—we have loads of green dresses, jumpers, skirts, pants, rompers, onesies, and tops for your little one.  Click our gorgeous green wooly hat and pretty special occasion dresses!    
Learn More
Happy Valentines Day!!
  • Article published at:
  • Article author: Joanne Steers
  • Article comments count: 0
Happy Valentines Day!!
Listen, we've all been there – scrolling through Pinterest at midnight, looking at those "simple" DIY Valentine's projects that somehow require a master's degree in crafting and tools you've never heard of.  Good news for the unprepared casual crafter—that is not my style. Today, I'm sharing two crafts that are actually, legitimately, I-can-do-this-while-watching-trashy-TV simple. No crafting experience required, just functioning hands and basic supplies you can probably find in your junk drawer (or steal from your kid's art stash).  First up: felt bows that are so easy to make, you'll wonder why you ever bought those overpriced ones at the store. Then we'll tackle a clay heart garland that looks like it came from an expensive boutique but costs less than your morning latte. The best part? You can totally mess these up and they'll still look cute. That's my kind of craft!  Project #1: Fabulous Felt Bows   Materials Needed: * Felt in whatever colors make your heart go pitter-patter * Scissors (the sharp kind, not those safety ones that couldn't cut through butter) * String or ribbon (about 12" if using string, 4" for ribbon) * Alligator clips or pin backings * Hot glue gun (because sometimes love needs a little help sticking together)  Instructions: 1. Cut your felt into a rectangle about 4½" x 2½"    2. Pinch that rectangle right in the middle 3. Wrap your string or ribbon around the pinched center  4. Tie a knot in the back, making it snug as a bug in a rug  5. Cut a thin piece of felt to wrap around the middle of your bow and secure with hot glue. 6. hot glue them together to create garland  But Wait, There's More, if you want to get really crazy and creative!  * Mix and match fabrics like a fashion designer gone wild * Add glittery hearts because SPARKLE * Cut out tiny felt hearts and stack them like a love sandwich * Try different strings - ribbon, twine, or even sparkly yarn * Make them in graduating sizes and create a bow family.  Admittedly I did none of the above. I kept mine simple because I liked the minimal vibe. I hot glued mine together to make a cute garland.    Project #2: The "How Is This So Easy?" Heart Garland  Materials Needed: * Air dry clay (the kind that doesn't require a kiln or a degree in ceramics) * Small heart cookie cutter (or free-hand it if you're feeling brave) * Pencil (literally any pencil – this is not the time to be picky) * Dried lavender (fancy, right?) * Hemp string * Rolling pin (I used a can of refried beans because I am classy) * Wax paper (to protect your counters from your artistic endeavors)  Instructions: 1. Roll out your clay to about ¼ inch thick (perfection not required – we're going for "handmade charm" here)  2. Cut out heart shapes with your cookie cutter    (Tip: If your hearts look wonky, just call them "abstract love symbols")  3. Press dried lavender into each heart     (Instant upgrade! Now they look like something from a French boutique)  4. Poke holes near the top with your pencil    (Size matters here – make them big enough for your string but not so big your hearts look like they're wearing hoop earrings)  5. Let them dry for 24-48 hours  6. String those babies up on your hemp string, spacing them about 2-3 inches apart And there you have it, folks! Two Valentine's crafts that are actually doable, totally adorable, and won't make you question your life choices halfway through. Hang your heart and bow garland proudly on your mantel (or over that pile of laundry you're ignoring).  Remember: If anyone asks where you got these adorable decorations, you have my permission to be super vague and mysterious about it. Just smile knowingly and say, "Oh, these? I made them." Then walk away before they ask for a tutorial. *P.S. If you end up making 47 bows at 2 AM while binge-watching your favorite show, just know that you're my kind of people. And yes, that clay heart garland totally counts as home decor until at least April. I don't make the rules. 🎀❤️ #CraftingWithoutCrying #ValentinesDIY #NailedIt #PinterestWho #CraftsForTheRestOfUs  
Learn More
The Self-Care Circus: Tips for Busy Moms Who Need a Little TLC
  • Article published at:
  • Article author: Joanne Steers
  • Article comments count: 0
The Self-Care Circus: Tips for Busy Moms Who Need a Little TLC
If you’re reading this, chances are you’re a mom with at least 37 things on your to-do list, performing yoga-level acrobatics just to change a diaper, and daydreaming about the next time you’ll be able to pee without an audience. Hold tight to that cup of now-lukewarm coffee as we offer some sage advice on good ole’ self-care.   Let’s be real, anyone who says self-care is selfish has probably never tried to dry shampoo their hair in the middle of a toddler tantrum. For us busy moms, self-care isn’t a luxury—it’s survival. Like the toddler snack requests that arrive exactly 1 second after they’ve refused lunch, self-care is essential.   We have compiled a list of simple ways to sneak in self-care moments amidst the chaos. Plus, a few handy products to make life feel a little less like a circus.   1.        Find a quiet moment to be alone with your thoughts As a busy parent it is crucial to find peace and quiet, whether that means setting an alarm and waking up at the crack of dawn or carving out time in the evening when little ones are in bed to soak in the silence.  Instead of jumping straight into the madness the second you wake up, try giving yourself a few blissful, quiet minutes. Brew that coffee or tea, step outside (even if it’s just on your porch), and soak in the peace before the household stirs. I like to eventize my morning coffee by drinking it out of one of my grandmother’s vintage bone China tea cups because who says China has to be reserved for special occasions!  I also like to get in one chapter from whatever book I am reading.    Here is a stunning mug from Anthropologie to make your morning ritual extra special: Bistro Garden Espresso Cup and Saucer   2.        Speedy Meditation Sessions Meditation doesn’t require a trip to a mountain retreat—just five minutes in between laundry loads or while the kids are momentarily entertained. Check out quick meditation tracks like Goodful's 5-minute Mediatation on YouTube, and you’ll feel like you’ve unlocked your inner Zen master. If you can find quiet for even five minutes, you’re already winning.          3.        Bath = Mini Spa When the little ones finally go down for a nap, sneak in some bath time like it’s your own personal spa escape. Grab a fancy bubble bath set like the Laura Mercier Almond Coconut Honey Bath, put on a podcast, I love Mother Funny, a podcast for the worlds okayst moms! (you can also check out our staff recommendations)   and let the world melt away for a little while.   4.        Wine & Unwind After a long day of momming, you’ve earned some serious downtime. Pour yourself a glass of your favorite wine (or tea, or mocktail—whatever suits your mood) and crack open a good book. We’ve got some great reads listed in our Vignette book recommendations blog. Snag one from Bookshop.org to support indie bookstores while you get your literary escape.   5.        Wear Your Chill Vibes Why not bring a little extra comfort to your self-care routine? Whether it’s your comfiest pajamas or something extra special like the Lunya Washable Silk Set, feeling cozy is the first step toward relaxation. Bonus: You’ll feel like a goddess even while dealing with homework drama or bedtime negotiations.   6.        Journaling for Sanity Journaling is like decluttering your brain after a long day. Snag a cheeky, motivational notebook from Papier and jot down the day’s highs, lows, and those hilarious moments that only moms understand (like finding cereal in your purse). Writing it all down is oddly satisfying and might just give you the reset you need. I like to list three things I am thankful for everyday and three things I would like to accomplish the following day.   These little acts of self-care are here to help you embrace your inner calm, even when life feels like a three-ring circus. Remember, self-care isn’t just a buzzword—it’s a way of reminding yourself that you’re more than just the person who picks up after everyone.   So go ahead, sip that coffee, take a bath, and give yourself the break you deserve. You’ve got this!  
Learn More
Looking for your next podcast obsession?
  • Article published at:
  • Article author: Joanne Steers
  • Article comments count: 0
Looking for your next podcast obsession?
Our team has you covered! With staff members from the sun-soaked beaches of San Diego, the vibrant streets of Berlin, and the charming nooks of England, we’ve gathered podcast recommendations that’ll keep your ears entertained and your mind buzzing. From feel-good stories about love, to deep dives into business empires, historical comedy, and even hilarious gossip, these picks reflect the quirky tastes and personalities of our wonderfully diverse crew.   From surfing the California coast, navigating the hustle of Berlin’s streets, or cozying up in a quaint English village, we’re bringing a little hometown vibe to our top picks. So,  grab your headphones, find a cozy spot (or multitask like the superhero parent you are), and let us take you on an audio journey. You’ve got errands to run—why not make them fun?   San Diego Team Picks Madigan’s Pick: This is Love You know that feeling when you curl up with a cup of hot coco and a good book? That’s what This is Love feels like for your ears. Hosted by the ever-so-soothing Phoebe Judge, each episode dives into the many forms and facets of love in a thoughtful and heartwarming way. The podcast tells intimate stories that capture love in all its varieties—whether it’s romantic love, the love for a passion or career, or even the unexpected bonds between humans and animals. Each episode focuses on a different real-life narrative, ranging from tales of enduring friendships to unusual acts of kindness, to the quirky and surprising ways people find connection. The stories are often emotional and inspiring, leaving listeners with a sense of hope and joy. It’s not your typical love stories—it’s love in its most unexpected, poignant forms. It’s like an auditory hug that leaves you feeling all warm and fuzzy inside. So, whether you’re stuck in traffic or folding that Mount Everest of laundry, This is Love is here to sweeten the moment.   Siobhan’s Picks: Normal Gossip  Normal Gossip Got a guilty pleasure for the juiciest gossip? Imagine sitting at a café eavesdropping on the most random, but oh-so-spicy stories from people’s lives—without the guilt! That’s what Normal Gossip brings. It’s the podcast equivalent of getting the tea from a friend of a friend of a friend, except this tea is piping hot and drama-filled. Perfect for when you need a break from the chaos of your own life and want to dive into someone else’s drama for a bit.   Acquired Acquired Ever wondered how big companies like Netflix or Amazon went from garage startups to global empires? Acquired breaks down the epic stories behind these business behemoths, but it’s not just for finance nerds! Even if you don’t care about market shares and IPOs, the hosts keep it engaging with humor and storytelling. Think of it like the superhero origin stories—except instead of capes, they’re wearing suits. Ideal for when you’re feeling like a boss and want to learn how other bosses made it big.  Added bonus:  They cover fashion houses like Hermes and Louis Vuitton’s road to success.   London Team Picks   Liz’s Picks: Just One Thing   Just One Thing If you’ve ever felt overwhelmed by life hacks and self-improvement tips, Just One Thing is a breath of fresh air. Hosted by Dr. Michael Mosley, each episode offers one simple, science-backed tip to improve your life. It’s bite-sized, practical, and you can actually implement it without feeling like you need to overhaul your entire existence. Perfect for when you’re juggling 15 things at once and just need one good idea to get through the day.   Holly Tucker’s Conversations of Inspiration Holly Tucker’s Conversations of Inspiration Want a shot of entrepreneurial inspiration with a side of British charm? Holly Tucker sits down with creators and small business owners to chat about how they turned their dreams into reality. It’s like getting cozy with a cuppa and hearing success stories that make you feel like you could do it too. Whether you’re thinking of starting a side hustle or just need a motivational boost, Holly’s got your back.   Jo’s Pick: You're Dead to Me You’re Dead to Me  History meets comedy in You’re Dead to Me, where top historians and comedians team up to make history fun and fascinating. It’s perfect for when you want to feel like you’ve learned something new—without feeling like you’re back in a classroom. From ancient civilizations to quirky historical figures, this podcast covers it all with a good dose of humor. Ideal for those moments when you need an intellectual break from Paw Patrol reruns.   Berlin Team Picks   Liza’s Picks: Desert Island Discs Desert Island Discs A classic for a reason. Imagine being stranded on a desert island and you can only take eight songs with you—what would they be? Celebrities and public figures from all over the world answer this question, giving you a peek into their personalities through their musical choices. It’s both relaxing and intriguing, like a musical escape. Great for when you need a mental vacation from the chaos of daily life.   My Therapist Ghosted Me My Therapist Ghosted Me Ever been ghosted by a therapist? Comedians Joanne McNally and Vogue Williams turn that awkward experience into comedy gold. Their hilarious banter covers everything from mental health struggles to life’s everyday absurdities—like awkward social encounters and wellness trends gone wrong. Listening feels like catching up with your funniest friends, where no topic is off-limits and laughter is guaranteed. Perfect for when you need a good laugh and a reminder that we’re all just trying to survive life’s hilarious mess!  
Learn More
Picture Perfect: Tips for Fun, Flawless, Fall Family Photos
  • Article published at:
  • Article author: Joanne Steers
  • Article comments count: 0
Picture Perfect: Tips for Fun, Flawless, Fall Family Photos
 It’s the season of togetherness, and what better way to celebrate than by capturing some stunning family photos? Whether you’re planning your annual holiday card or simply want to freeze everyday moments, we’ve got you covered. Here are a few tips to make sure you capture your family’s magic, along with some easy ideas for choosing outfits that look coordinated without turning you into the Von Trapp family.    1. Forget matchy-matchy—think coordinated Matching outfits? A thing of the past. The secret sauce is coordinating your crew in a way that makes you look like you belong together without looking like clones. Pick 2-3 colors that vibe well, but don’t be afraid to mix it up. Soft blues, greys, and whites always work, or lean into those autumn tones—think earthy browns, mustard, and burgundy. Trust me, you’ll look put-together, not posed.   2. Texture is Your Friend  Want to make your photos pop? Layers and textures are key. Think of cozy knits, lacy details, or a combination of denim and velvet. Little touches like scarves, hats, or boots can add a playful edge without overwhelming the shot. Vignette’s girls’ dresses are always a win—ruffles and textures that bring interest but won’t steal the show. The goal is for everyone to look like the best version of themselves, not overstyled.   3. Pick a fun spot with meaning  Location is half the battle. A beautiful backdrop can turn an ordinary photo into something frame-worthy. Here are a few ideas to spark your creativity: The Beach: There’s nothing quite like the beach at golden hour for that soft, glowing light. Let the kids run wild, and capture the fun, sandy feet and all. Botanical Gardens: Lush greenery and colorful flowers? Yes, please. The perfect balance of natural beauty and space for the kids to explore while you snap those shots. Your Favorite Park: If you’re into a rustic vibe, a park with big trees or an old fence can create a charming, laid-back setting. Plus, plenty of room for everyone to move without feeling crowded. Home Sweet Home: Sometimes, the most personal photos are the ones you take in your own space. Snuggling up for a story on the couch, baking cookies in the kitchen—it’s all about capturing those small, everyday moments that tell your family’s story.   4. Timing is everything If you’re shooting outdoors, aim for that sweet spot early in the morning or late afternoon. Photographers call it “golden hour” for a reason—the light is soft, warm, and super flattering. If you’re staying inside, natural light from windows is your best friend. Just stay clear of harsh overhead lights that create shadows.   5. Keep it fun and easy Let’s be real: family photo day can feel like herding cats. But it doesn’t have to be stressful. Keep things light by playing some music, bringing along a favorite toy, or letting the kids move around. Some of the best shots are the ones where no one is looking at the camera, but everyone is laughing. Don’t aim for perfection; aim for real moments.  Hot tip:  For some added motivation, In years past I have rewarded my kids with a fun family dinner afterward of their choice: Sushi, In n Out, their favorite pizza place, or a stop at the ice cream shop on the way home as a thank you for a job well done.   6. A little prep goes a long way  Want to keep things running smoothly? Have everyone try on their outfits ahead of time to avoid any last-minute “surprises.” And don’t forget the details—a quick steam or a few swipes with a lint roller can make all the difference in making your pulled-together look stand out.   7. Make sure to have snacks, water, and wet wipes on hand! Smile and Say “Cheese!” With these tips, you’re ready to snap some gorgeous, authentic family photos you’ll cherish for years to come. And remember, Poppet & Fox has all style staples to keep your little one looking their best without feeling overdone. Now get out there and capture those memories!
Learn More
Spook-tacular Halloween Crafts- Fun, Easy Ideas for Kids and Parents to Make Together!
  • Article published at:
  • Article author: Joanne Steers
  • Article tag: bats
  • Article comments count: 0
Spook-tacular Halloween Crafts- Fun, Easy Ideas for Kids and Parents to Make Together!
Ready to add a dash of magic to your Halloween décor? We’ve conjured up two delightful DIY crafts that are as fun to make as they are to display: charming mini pumpkin flower arrangements and whimsical coffee filter bats. These projects are perfect for a cozy afternoon of creativity with the kids—no advanced crafting skills required! Whether you're aiming for a stylish fall centerpiece or playful hanging décor, these ideas blend spooky with sophistication. So, grab your crafting supplies and a cup of cider—it’s time to get delightfully hands-on this Halloween!   Halloween Coffee Filter Bats  These Halloween coffee filter bats are the perfect combination of easy, creative, and just a little bit spooky! Plus, they use materials you likely already have at home. Let’s dive in and make some colorful, fluttering bats! Materials You'll Need: - Coffee filters (white) - Washable markers (black, purple, orange, or any Halloween colors) - Spray bottle with water - Clothespins - Googly eyes (optional) - Scissors - Glue or tape - A workspace that can get a little wet (like a tray or old newspaper) Step-by-Step Instructions:  1. Color Your Coffee Filter:  Lay a coffee filter flat and let your kids go wild with the washable markers! Use traditional Halloween colors like black, purple, and orange, or let them get creative. The goal is to cover as much of the coffee filter as possible with color.   2. Spritz with Water: Once the coffee filters are fully decorated, it’s time for the magic! Use the spray bottle to lightly mist the coffee filter. The washable marker ink will start to blend and spread, creating a cool tie-dye effect. Be careful not to over-spray; you want it to stay colorful, not soggy!   3. Let Them Dry:  Leave the coffee filters to dry for about an hour. You can speed things up by using a hairdryer on low heat if your little ones are eager to see the final result.   4. Add the Body:  Once the filters are dry, fold them in half. Take a clothespin and clip it in the middle of the folded filter, so that the filter looks like the bat's wings. The clothespin will act as the bat’s body.     5. Googly Eyes for Extra Spookiness:  Glue on a pair of googly eyes to the top of the clothespin. If you don’t have googly eyes, you can draw them with a marker.   6. Hang and Enjoy:  Clip your bats onto a string or curtain rod, or scatter them around your home for a fun Halloween decoration!  Halloween Fun Fact: Bats are actually great for the environment because they help control insect populations! One bat can eat up to 1,000 mosquitoes in a single hour. So, these little guys are definitely friends, not foes!    Mini Pumpkin Flower Bouquets:  When Madigan, our marketing guru, shared photos of the mini pumpkin flower arrangements she made in our work group chat, I knew we had to feature them in this blog. They’re simply stunning! These charming mini bouquets blend pumpkins and flowers—two fall favorites—into one effortlessly adorable craft. Perfect for a cozy afternoon of creativity, these easy DIYs double as beautiful table decorations and are ideal for little hands to help with. Paired with our whimsical coffee filter bats, you'll have the perfect combination of spooky and chic to elevate your Halloween décor! Let’s dive in and make your home pumpkin-spiced and everything nice!  What You’ll Need: - Small pumpkins (about the size of your palm) - A mix of fall flowers (Madigan used Trader Joes flowers) - Floral foam (you can grab this at any craft store) - A spoon (for scooping) - A sharp knife (for grown-up use only!) - Water (to keep the flowers fresh)    How to Make Your Mini Pumpkin Flower Bouquets: Pick Your Pumpkin  Choose small pumpkins—think palm-sized! They can be any color, but white, orange, or even pale green pumpkins will really make those fall flowers pop. Cut Off the Top (Carefully!) This is the part where the grown-ups take charge! Using a sharp knife, cut off the top of the pumpkin, about 1 to 2 inches below the stem, creating a little pumpkin lid. Make sure the hole is wide enough for your flowers to sit inside. Scoop Out the Insides Time to scoop out those seeds! Kids can grab a spoon and start removing the pumpkin guts. Save the seeds for roasting later (bonus project, anyone?). Prep Your Pumpkin for Flowers  Take your floral foam and cut it down to fit snugly inside the hollowed-out pumpkin. Soak it in water for a few seconds so it’s nice and moist—this will keep your flowers fresh for longer. Arrange the Flowers Now, for the fun part! Help your kids trim the flower stems to just the right height (about 4 to 5 inches tall), then push the stems into the floral foam. Have fun playing with colors and different flower types! You can go for a monochromatic fall palette, or mix bright oranges, reds, yellows, and purples for a full-on autumn explosion. Finishing Touches  Once your mini pumpkin bouquet is full of flowers, place it as the centerpiece of your table, or give it to a neighbor as a sweet fall gift! If you’re feeling extra fancy, tie a ribbon around the base of the pumpkin for some added flair.  And there you have it! Cute, simple, and bursting with autumn charm. Let those little hands get messy and creative—it’s all part of the fun! 🍂🎃
Learn More